
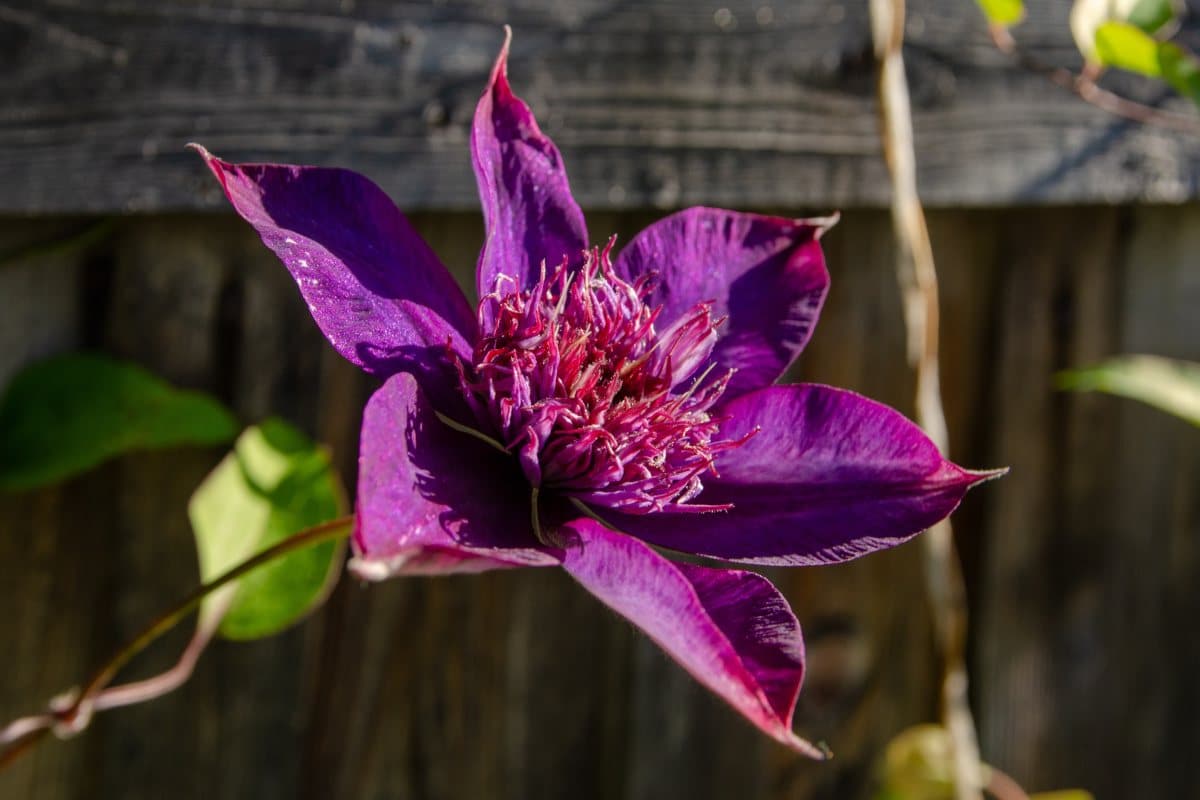
The Essential Steps for Successful Clematis Plant Expansion: Clematis, with their vibrant blooms and graceful vines, are a beloved addition to any garden. However, achieving successful clematis growth requires a thoughtful approach that considers the specific needs of these captivating plants.
From selecting the right variety to providing proper care, a series of essential steps contribute to thriving clematis that will reward you with a tapestry of colorful flowers for years to come.
This comprehensive guide delves into the intricacies of clematis cultivation, providing a roadmap for success. We’ll explore the different clematis groups, their unique characteristics, and how to choose the perfect variety for your garden. We’ll then guide you through the process of preparing the ideal planting site, ensuring proper soil conditions, sunlight exposure, and drainage.
Once your clematis is planted, we’ll delve into the crucial aspects of watering, fertilizing, and pruning to encourage healthy growth and abundant blooms. Finally, we’ll discuss common pests and diseases that may affect clematis, offering preventative measures and treatment options.
Selecting the Right Clematis Variety
Choosing the right clematis variety is crucial for successful plant expansion. Understanding the different clematis groups and their growth habits will help you select a variety that thrives in your specific climate and location.
Clematis Groups and Their Growth Habits
Clematis varieties are classified into different groups based on their blooming time, flower size, and growth habits. Understanding these groups helps gardeners select varieties suitable for their specific needs and growing conditions.
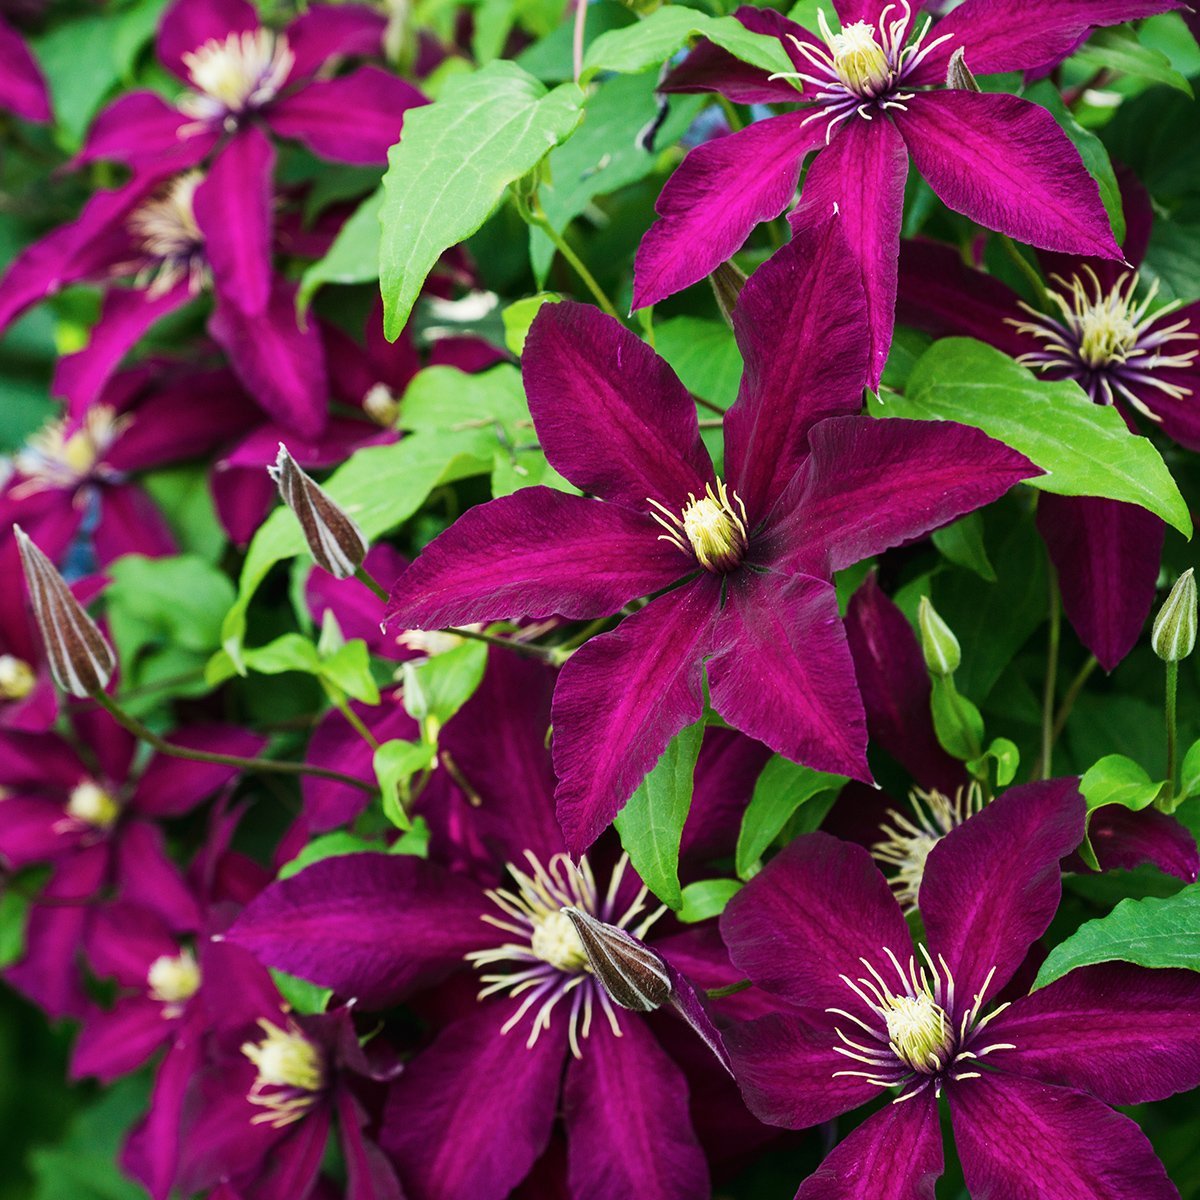
- Jackmanii Group:This group is known for its large, showy flowers that bloom in late spring and summer. They are vigorous climbers with strong stems and can reach heights of 15-20 feet. Popular varieties include ‘Jackmanii’ and ‘Niobe’.
- Viticella Group:These clematis are known for their smaller, bell-shaped flowers that bloom profusely from late spring to early fall. They are vigorous climbers with a more spreading habit and can reach heights of 10-15 feet. Popular varieties include ‘Etoile Violette’ and ‘Ville de Lyon’.
- Patens Group:This group features large, saucer-shaped flowers that bloom in early spring. They are less vigorous climbers than the Jackmanii and Viticella groups, reaching heights of 6-10 feet. Popular varieties include ‘The President’ and ‘Mrs. Cholmondeley’.
Comparing Clematis Varieties
The following table provides a comparison of various clematis varieties, highlighting their bloom time, flower color and size, and ideal growing conditions.
Variety |
Bloom Time |
Flower Color |
Flower Size |
Ideal Growing Conditions |
|---|---|---|---|---|
‘Jackmanii’ |
Late spring to summer |
Purple |
6-8 inches |
Full sun to partial shade, well-drained soil |
‘Niobe’ |
Late spring to summer |
Dark purple |
6-8 inches |
Full sun to partial shade, well-drained soil |
‘Etoile Violette’ |
Late spring to early fall |
Purple |
2-3 inches |
Full sun to partial shade, well-drained soil |
‘Ville de Lyon’ |
Late spring to early fall |
Red |
2-3 inches |
Full sun to partial shade, well-drained soil |
‘The President’ |
Early spring |
Blue |
6-8 inches |
Partial shade, well-drained soil |
‘Mrs. Cholmondeley’ |
Early spring |
Pink |
6-8 inches |
Partial shade, well-drained soil |
Choosing a Clematis Variety for Your Climate and Location, The Essential Steps for Successful Clematis Plant Expansion
Selecting a clematis variety suitable for your specific climate and location is essential for successful plant growth. Consider the following factors:
- Hardiness Zone:Clematis varieties have different hardiness zones, which indicate the range of temperatures they can tolerate. Choose a variety that is suitable for your region’s climate.
- Sunlight Requirements:Different clematis varieties have varying sunlight needs. Some prefer full sun, while others thrive in partial shade. Select a variety that will receive the appropriate amount of sunlight in your garden.
- Soil Type:Clematis prefer well-drained soil. If your soil is heavy or clay-like, amend it with compost or other organic matter to improve drainage. Avoid planting clematis in areas with poor drainage, as this can lead to root rot.
- Space Availability:Clematis can grow quite large, so ensure you have enough space for the variety you choose. Consider the mature size of the plant and its growth habit when selecting a location.
Preparing the Planting Site

Clematis thrive in well-prepared planting sites that meet their specific requirements for soil, sunlight, and drainage. Providing the right conditions ensures healthy growth, abundant blooms, and a long-lasting display of beauty in your garden.
Soil Requirements
The ideal soil for clematis is rich, fertile, and well-drained. The soil should be loose enough to allow for proper root development and water penetration.
- pH:Clematis prefer a slightly acidic to neutral soil pH, ranging from 6.0 to 7.0. This pH range ensures the availability of essential nutrients for healthy growth.
- Drainage:Excellent drainage is crucial for clematis as they are susceptible to root rot in waterlogged conditions. The soil should allow excess water to drain quickly, preventing water from pooling around the roots.
- Fertility:Clematis benefit from fertile soil rich in organic matter. Adding compost or well-rotted manure to the planting site improves soil structure, aeration, and nutrient content.
Sunlight and Shade
Clematis varieties have different preferences for sunlight exposure. Some varieties thrive in full sun, while others prefer partial shade.
- Full Sun:Clematis varieties that prefer full sun require at least 6 hours of direct sunlight per day. Examples of full-sun clematis include ‘Jackmanii,’ ‘Nelly Moser,’ and ‘Ville de Lyon.’
- Partial Shade:Clematis that prefer partial shade need protection from the intense afternoon sun. They thrive in locations that receive morning sun and afternoon shade. Examples of partial-shade clematis include ‘Blue Angel,’ ‘Niobe,’ and ‘Mrs. Cholmondeley.’
Preparing the Planting Site
Preparing the planting site involves several steps to ensure optimal conditions for clematis growth.
- Soil Amendment:Incorporate organic matter, such as compost or well-rotted manure, into the soil to improve drainage, aeration, and fertility. This amendment creates a loose, friable soil structure that promotes healthy root growth.
- Drainage Improvement:If the soil is prone to waterlogging, improve drainage by adding a layer of gravel or crushed stone to the bottom of the planting hole. This layer helps to direct excess water away from the roots.
- Planting Depth:Plant clematis with the crown (the point where the roots meet the stem) at or slightly below soil level. This ensures proper root development and prevents the crown from becoming exposed to the sun, which can lead to damage.
Planting the Clematis
Planting your clematis correctly is crucial for its growth and success. Ensure the planting hole is adequately sized and the soil is well-prepared to provide optimal conditions for the plant’s roots to thrive.
Planting Depth and Spacing
The depth and spacing at which you plant your clematis are critical for its growth and stability. Planting too deep can hinder root development, while planting too shallow can lead to instability and exposure to harsh conditions.
- Planting Depth:Plant the clematis so that the crown, where the roots meet the stems, is just below the soil surface. This ensures the roots have enough space to spread and access nutrients and moisture.
- Spacing:The recommended spacing between clematis plants depends on the variety and the size of the mature plant. However, a general guideline is to space them 2-3 feet apart, allowing room for growth and air circulation.
Supporting the Clematis
Clematis plants are known for their vigorous growth and can reach significant heights. To ensure their stability and prevent them from becoming entangled or damaged, providing adequate support is essential.
- Trellises:Trellises come in various shapes and sizes, providing a structured support system for the clematis to climb. Wooden trellises, metal trellises, and even decorative arches can be used to enhance the visual appeal of your garden while providing necessary support.
- Fences and Walls:Clematis plants can be trained to grow along fences and walls, adding a vertical element to your garden design. Ensure the fence or wall is sturdy enough to support the weight of the mature plant.
- Other Structures:Clematis can also be trained to climb arbors, pergolas, and even trees, creating a natural and captivating display.
Companion Plants
Planting clematis with companion plants can create a harmonious and beneficial environment for both. Companion plants can provide shade, improve soil conditions, deter pests, or attract beneficial insects.
- Roses:The combination of roses and clematis is a classic pairing, offering a beautiful display of colors and textures. Roses can provide shade for the clematis’ roots, while the clematis adds vertical interest to the rose bush.
- Lavender:Lavender’s fragrant flowers and strong aroma can deter pests that may harm the clematis. It also adds a delightful scent to the garden.
- Salvia:Salvia, with its vibrant blooms and ability to attract pollinators, complements the clematis well. It can also help improve soil drainage.
Watering and Fertilizing: The Essential Steps For Successful Clematis Plant Expansion
Clematis thrive in consistently moist soil, and proper watering is crucial for their growth and overall health. Providing the right amount of water at the appropriate frequency ensures that the roots remain hydrated, facilitating the uptake of nutrients and supporting vigorous growth.
Watering Clematis
Clematis require consistent moisture, particularly during the growing season (spring and summer). Watering frequency and amount depend on factors such as climate, soil type, and the age of the plant. Generally, young plants need more frequent watering than established ones.
Here’s a general guide for watering clematis:* Frequency:Water deeply once or twice a week, ensuring the soil is thoroughly moistened to a depth of 12 inches.
Amount
Apply enough water to soak the soil around the base of the plant, but avoid overwatering.
Dry Periods
During extended dry spells, increase watering frequency to maintain soil moisture.
Mulch
A layer of organic mulch, such as wood chips or shredded bark, helps retain soil moisture and suppress weeds.
Fertilizing Clematis
Clematis benefit from regular fertilization, especially during their active growth phase. Proper fertilization provides essential nutrients that support healthy growth, vibrant blooms, and overall plant vigor.* Type of Fertilizer:Use a balanced, slow-release fertilizer formulated for flowering plants. This type of fertilizer gradually releases nutrients over time, minimizing the risk of nutrient burn.
Frequency
Fertilize clematis in early spring before new growth emerges, and again in mid-summer after the first flush of blooms.
Application
Apply fertilizer around the base of the plant, avoiding direct contact with the stem.
Organic Options
Compost and well-rotted manure can also be used as organic fertilizers, providing essential nutrients and improving soil structure.
Important Note:Avoid over-fertilizing clematis, as this can lead to excessive foliage growth at the expense of flowering.
Pruning Clematis
Pruning clematis is a crucial step in maintaining their health, promoting abundant flowering, and ensuring a well-structured plant. Clematis are categorized into three pruning groups based on their flowering habits and growth patterns. Understanding these groups is essential for implementing the appropriate pruning techniques.
Pruning Groups for Clematis
Clematis pruning groups are categorized based on their flowering time and growth habits, determining the appropriate pruning approach for each type.
- Group 1:These clematis bloom on the previous year’s growth, meaning they produce flowers from buds that developed the previous season. Pruning these clematis is generally minimal, involving only deadheading spent flowers and removing any damaged or diseased stems. Examples include Clematis montana and Clematis alpina.
- Group 2:This group blooms on both the previous year’s growth and new growth. They produce flowers from buds on older stems and new stems. Pruning for this group involves removing dead or damaged stems and shortening some of the new growth to encourage bushier growth.
Examples include Clematis macropetala and Clematis armandii.
- Group 3:These clematis bloom on the current year’s growth, meaning they produce flowers from buds that develop on new stems. Pruning for this group involves cutting back the stems to within a few inches of the ground in late winter or early spring.
This encourages strong, new growth that will produce an abundance of flowers. Examples include Clematis jackmanii and Clematis viticella.
Pruning Clematis for Different Growth Habits and Bloom Times
The specific pruning techniques vary depending on the clematis’s growth habit and bloom time.
- Group 1 Clematis:
- Pruning Time:After flowering, typically in late spring or early summer.
- Technique:Lightly prune by removing dead or damaged stems and deadheading spent flowers. This encourages continued growth and flowering for the current season.
- Group 2 Clematis:
- Pruning Time:After flowering, typically in late spring or early summer.
- Technique:Remove dead or damaged stems and shorten some of the new growth to promote bushier growth. This encourages both new and older stems to produce flowers.
- Group 3 Clematis:
- Pruning Time:Late winter or early spring, before new growth emerges.
- Technique:Cut back all stems to within a few inches of the ground. This encourages strong, new growth that will produce an abundance of flowers.
Importance of Pruning for Clematis
Pruning clematis is essential for several reasons:
- Promotes Healthy Growth:Regular pruning encourages new growth, promoting a healthy and vigorous plant. It also removes dead or diseased stems, preventing the spread of diseases.
- Encourages Abundant Flowering:By removing old or damaged stems, pruning allows for the development of new growth that produces an abundance of flowers.
- Maintains Plant Shape:Pruning helps to maintain the desired shape and size of the clematis, ensuring a well-structured and aesthetically pleasing plant.
- Prevents Overcrowding:Pruning prevents overcrowding by removing excess stems and foliage, allowing for proper air circulation and sunlight penetration.
Protecting Clematis from Pests and Diseases
Clematis plants, with their vibrant blooms and captivating foliage, are susceptible to various pests and diseases that can compromise their health and beauty. While some pests and diseases are minor, others can severely damage the plant if left untreated. Understanding the common culprits and implementing preventative measures can help you safeguard your clematis and enjoy its vibrant presence for years to come.
Preventing Pests and Diseases
Preventing pests and diseases is crucial for maintaining healthy clematis plants. Implementing a combination of proactive measures can significantly reduce the risk of infestation and infection.
- Choose Disease-Resistant Varieties:Selecting clematis varieties known for their resistance to common diseases is a fundamental preventative step. Consulting with local nurseries or experienced gardeners can provide valuable insights into disease-resistant cultivars.
- Provide Adequate Space and Air Circulation:Clematis thrives in well-ventilated environments. Ensure sufficient spacing between plants to allow for adequate air circulation, reducing the likelihood of fungal diseases that thrive in humid conditions.
- Avoid Overwatering:Excessive watering can create a moist environment that encourages fungal growth. Water clematis deeply but infrequently, allowing the soil to dry slightly between waterings.
- Maintain Good Sanitation:Regularly remove and dispose of any diseased or infected plant material to prevent the spread of pathogens. This includes removing fallen leaves, stems, and flowers that show signs of disease.
- Inspect Regularly:Regularly inspect your clematis for any signs of pests or diseases. Early detection allows for prompt action, increasing the chances of successful treatment.
Propagating Clematis
Propagating clematis allows gardeners to expand their collection of these beautiful vines, create new plants from existing ones, or preserve rare varieties. There are several methods for propagating clematis, each with its own advantages and considerations.
Cuttings
Taking cuttings is a common method for propagating clematis. This involves taking a section of stem from a healthy plant and encouraging it to develop roots.
- Softwood Cuttings:These are taken from new growth in the spring or early summer when the stems are still soft and pliable. Softwood cuttings are typically taken from the current year’s growth and are easier to root than hardwood cuttings.
- Semi-Hardwood Cuttings:These are taken in late summer or early fall when the new growth has hardened but is not yet woody.
Semi-hardwood cuttings are more mature than softwood cuttings, and they are more likely to survive the winter.
- Hardwood Cuttings:These are taken in the winter when the plant is dormant. Hardwood cuttings are the most difficult to root, but they are the most likely to survive the winter.
Similar to the meticulous care required for clematis, successfully expanding your schefflera collection necessitates a keen understanding of propagation techniques. Whether you’re layering clematis stems or rooting schefflera cuttings, mastering the art of propagation is crucial for successful plant expansion.
For a comprehensive guide on the intricacies of schefflera propagation, consult this informative article: How to Achieve Success in Schefflera Propagation with These Expert Tips. By applying the same level of precision and attention to detail, you can confidently expand your clematis collection and enjoy the beauty of these vibrant vines for years to come.
To take a cutting, follow these steps:
Similar to the careful attention required for clematis plant expansion, success in propagating Venus fly traps demands a methodical approach. Just as you would ensure proper soil conditions and pruning techniques for your clematis, understanding the unique requirements of Venus fly traps is crucial for successful propagation.
For a comprehensive guide on this fascinating process, check out No More Plant Struggles: Venus Fly Trap Propagation for Success , which delves into the specific techniques for maximizing your chances of success. Just like with clematis, patience and consistent care are key to nurturing healthy, thriving Venus fly traps.
- Choose a healthy stem from a non-flowering plant.
- Cut the stem just below a node (where a leaf or bud grows).
- Remove the leaves from the bottom inch or two of the stem.
- Dip the cut end of the stem in rooting hormone.
- Plant the cutting in a pot filled with a well-draining potting mix.
- Keep the cuttings moist and in a warm, humid location.
- Once the cuttings have rooted, they can be transplanted to their permanent location.
Layering
Layering is a simple and effective method for propagating clematis. It involves bending a stem to the ground and encouraging it to root.
- Air Layering:This method involves wrapping a section of stem with sphagnum moss and plastic wrap. The moss will stay moist and encourage the stem to develop roots.
- Tip Layering:This method involves bending the tip of a stem to the ground and burying it in the soil.
The tip of the stem will develop roots and can be cut from the parent plant once it is rooted.
To layer a clematis, follow these steps:
- Choose a healthy stem from a non-flowering plant.
- Gently bend the stem to the ground and secure it in place with a wire or stone.
- Make a small cut in the stem where it touches the ground.
- Cover the cut with soil and keep it moist.
- Once the stem has rooted, it can be cut from the parent plant.
Division
Clematis can also be propagated by division, although this method is only suitable for plants that have multiple stems.
- This method involves digging up the plant and dividing it into smaller sections, each with its own roots.
- This method is best done in the spring or fall when the plant is dormant.
To divide a clematis, follow these steps:
- Dig up the plant and gently remove it from the ground.
- Use a sharp knife or shovel to divide the plant into smaller sections.
- Make sure each section has its own roots.
- Plant the divided sections in their new location.
Ending Remarks
By following these essential steps, you can unlock the secrets to successful clematis cultivation. From selecting the right variety to providing proper care, each step contributes to a thriving clematis that will grace your garden with its vibrant blooms for years to come.
Embrace the journey of nurturing these captivating vines, and watch as they transform your landscape into a symphony of color and elegance.
Essential FAQs
What is the best time to plant clematis?
The best time to plant clematis is in spring or fall when the soil is cool and moist.
How often should I water my clematis?
Clematis need consistent moisture, especially during dry periods. Water deeply and thoroughly, allowing the soil to dry slightly between waterings.
What type of fertilizer should I use for clematis?
Use a balanced fertilizer, such as a 10-10-10 formula, for clematis. Apply fertilizer in spring and early summer.
